Events
This page is for the Executive and Event Manager personas — anyone who creates events, sets up ticket tiers, manages registrations, or runs a referral program. The Quick Start walks the full lifecycle from creation to night-of; the deeper sections drill into each step.
What this is / Why you'd use it
An event in Blaqbook is a single show — date, venue, lineup — that buyers attach to when they purchase a ticket. Each event holds a stack of related records: ticket tiers (Early Bird, GA, VIP — multiple per event, each with its own price and seat cap), registrations (one per person who bought or comped in, paid or not), vendor slots (each DJ, photographer, security line), and optional referral codes.
A referral code on an event is a per-buyer short link — the buyer shares it, friends purchase through it, and Blaqbook tracks the chain so you can pay out a reward. It's optional; toggle it per event.
You'd reach for this page when you create a new show, change ticket pricing or seat caps mid-sale, view or edit the guest list, or want a referral program for the night. The walkthroughs at the bottom of the page take the same workflow end-to-end with operator judgment notes — useful once you've run an event or two.
Quick Start: Your First Event End-to-End
- Log in as Executive or Event Manager
- Go to Events → Events → New
- Fill in event name, date, location, and description
- Click the Tickets tab → add ticket tiers (Early Bird, GA, VIP, etc.) with quantities and prices
- Click Go to Website to preview the public ticket page
- Toggle Published on the website to make it live
- Share the event URL with your audience
- On event night: open
https://[your-domain]/blaqbook/scanneron your phone — see Door Scanner - After the event: go to Events → P&L Dashboard — see Finance
Creating an Event
- Go to Events → Events in the top menu
- Click New (top-left)
- Fill in:
- Name — the event title shown on tickets and the website
- Date — start and end date/time
- Location — venue name and address
- Description — shown on the public ticket page (supports formatting)
- Upload a cover image under the Extra Info tab
- Save with the save button (top-left) or by navigating away
Setting Up Ticket Tiers and Promo Codes
Ticket tiers (inside the event form):
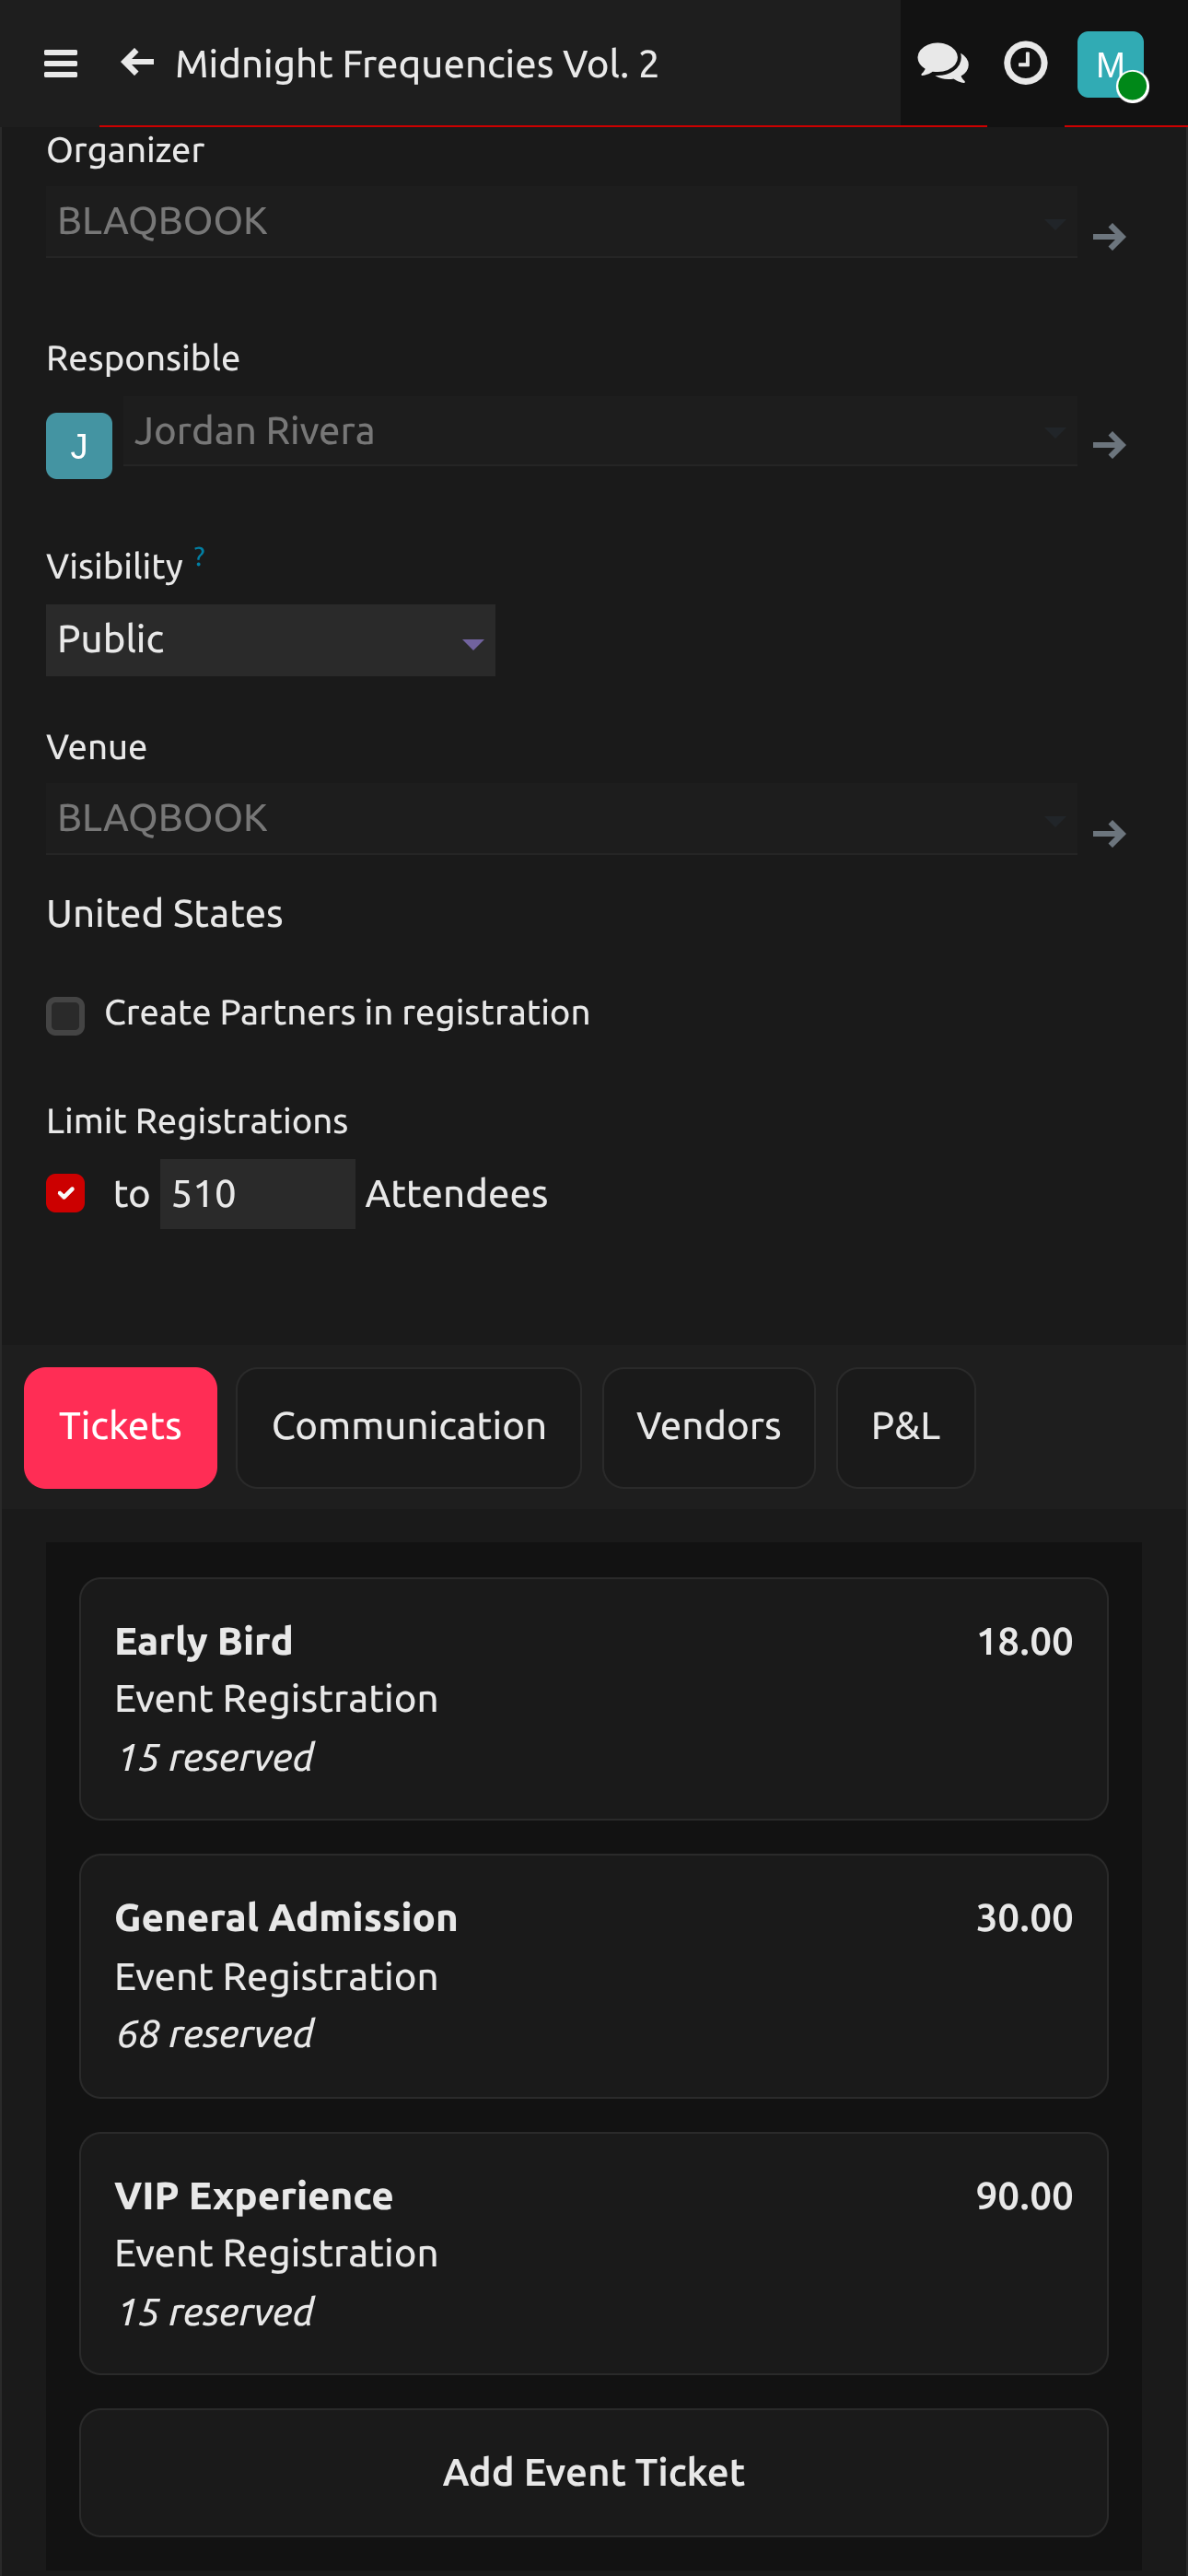
The Tickets, Communication, Vendors, and Questions tabs all show their entries as cards in a grid (3 across on desktop, 2 on tablet, 1 on phone). Click any card to open its full edit form in a popup; click New to add another. There is no inline list view on these tabs.
- Click the Tickets tab
- Click New to add a tier
- For each tier, set:
- Name — e.g., "Early Bird", "General Admission", "VIP"
- Price — what customers pay (or $0.00 for free/comps)
- Available Seats — max quantity for this tier (leave blank for unlimited)
- Sale Dates — optional start/end window (useful for Early Bird cutoffs)
- Save the popup, then repeat for each tier
Publishing the event:
- Click Go to Website (button at top of event form)
- Click the Unpublished toggle in the top-right of the website preview — it will flip to Published
- The event is now live and accepting purchases
Promo codes:
- Go to Events → Events → [your event]
- Click the Tickets tab, then Enable Promo Codes
- Go to CRM → Blaqbook → Loyalty Programs to create discount codes
- Set discount type (% off or fixed amount), the code, and which ticket it applies to
Viewing the Guest List
- Go to Events → Events → [your event]
- Click Registrations (button at top of the event form showing count)
- You'll see a list of all registered attendees with their ticket tier and status
- Filter by status (Registered / Attended) using the search bar
- Export to CSV using the gear icon → Export if needed for printing
Using the Referral Link System
When referral is enabled on an event, every ticket buyer gets a unique share link in their confirmation email.
Enable referrals on an event:
- Open the event form → Referrals tab
- Toggle Enable Referral Program on
- Set:
- Reward Type — discount or loyalty points
- Reward Value — amount or percentage
- Loyalty Program — which program to credit rewards to
View referral activity:
- Go to CRM → Blaqbook → Referrals
- See the list of all referral codes with click counts, conversions, and reward status
- Switch to Leaderboard view to see top referrers ranked
FAQ — Events
The event page isn't showing on the website.
The event is probably not published. Go to the event form → Go to Website → check the Published toggle in the top-right corner.
A guest says they bought a ticket but can't find the email.
- Go to Events → [event] → Registrations
- Search by the guest's email
- If found, open their registration and click Send Email to resend the confirmation
Walkthrough: From Blank Form to Next-Morning P&L
The Quick Start above gets you through the screens in nine numbered steps. This walkthrough is the long-form version — what each stage actually feels like, when you do it, and where it hands off to other pages. Use this once you've run an event or two and want to see the whole arc in one place.
The scenario throughout: a Friday-night show three weeks out. Your venue is The Velvet Room. Doors at 10pm.
                                                                  ┌─── Saturday morning
3 weeks out ── 2 weeks out ── week-of ── Fri 9pm ── Fri 10pm-1am ─┘
create+lock   publish+share   soft-launch  pre-doors   running door   settle
Three weeks out — create the event and lock the basics
- Events → Events → New. Fill in the event name, date, location, description, and cover image. Save with the disk icon (top-left) or by clicking away — Odoo auto-saves.
- Open the Tickets tab and add your tiers. For a typical Friday: Early Bird ($15, available until 7 days before doors), General Admission ($25), and a small VIP allotment ($50, limit 30 seats). See Setting Up Ticket Tiers and Promo Codes for the field-by-field.
- Open the Vendors tab and pencil in vendor slots — Sound, Stage, DJ, Lighting, Security — even before contracts are locked. Leave the Vendor field blank if you don't have the name yet; just claim the role and an estimated rate so the P&L knows what to expect. See Finance → Adding a Vendor.
By the end of this stage the event exists in the system but is unpublished. Nothing is public yet.
Two weeks out — publish and share
- From the event form click Go to Website. The public ticket page renders with whatever you've entered so far.
- Click the Unpublished toggle in the top-right of the preview — it flips to Published. The page is now live.
- Copy the URL. This is your shareable link for IG bio, mailing list, Discord, posters, etc.
- If referrals are part of your promo plan, enable them now via the Referrals tab. Every ticket buyer will get a personal share link in their confirmation email.
In practice you'd also schedule a pre-event SMS blast around now — see Sending an SMS Blast.
Week-of — soft-launch checks
A few things to confirm in the last 5–7 days:
- Open Events → P&L Dashboard and find the event row. The "expected ticket revenue" line should reflect your tier limits × prices. If it's $0, no tickets have sold yet — that's normal, just a sanity check that the data path works.
- Open Events → [event] → Registrations and search for your own email. The earliest test purchase you ran through Stripe should be there. If it's in Draft state, the payment didn't clear.
- Check the Manager Dashboard → Day-of Checklist tab for this event. Walk the eight items; tick them off as crew confirms. The vendor coverage badge on the Upcoming Events tab should be green by Wednesday or you're chasing someone.
Friday 9pm — doors not yet open
Door / Crew opens the Door Dashboard on their phone and taps OPEN SCANNER. The scanner page loads at /blaqbook/scanner and asks which event. They pick tonight's show.
Behind the bar, the manager opens a Point of Sale session — the door cash drawer for at-the-door ticket sales and merch (see eCommerce). Both the scanner and POS run off the same registrations data, so a $30 cash sale at the door becomes a scannable QR on the next phone in line.
Friday 10pm–1am — running the door
The flow at the scanner:
- Green check = valid ticket, guest is now marked Attended. Wave them in.
- Red X = something's off. The screen shows the reason: already scanned, wrong event, or registration still in Draft. See Door Scanner for triage.
- Guest can't find their email. Don't hold up the line. Send them to the manager, who opens Events → [event] → Registrations on a backend tablet, searches by name, and clicks the Attended state label on their record. (This is what Manual Guest-List Check-In is for.)
The Door Dashboard auto-refreshes the check-in count every 30 seconds — useful for the bar manager pacing inventory against headcount.
Saturday morning — settle the night
- Events → P&L Dashboard → [event]. Green row = profit. Red row = loss. Click in for the breakdown: ticket revenue (Stripe), POS revenue (door cash + merch), vendor costs (your earlier slot lines), other expenses, net profit. See Running a P&L Report for the field-by-field.
- Vendors tab → Create Draft Vendor Bills. One unpaid bill per vendor slot lands in Invoicing → Vendors → Bills, ready for the Finance persona to schedule payment.
- Add any expenses that weren't pre-booked vendor slots: ice runs, the last-minute extra security guy, the door float reimbursement. P&L tab → Expenses → Add a line.
- Stripe's payout hits the bank account on its own schedule (typically a couple of days after the event). When it lands, reconcile the payout against the event so cash-in-bank matches the P&L numbers.
What to remember
- The event form's tabs (Tickets / Vendors / Communication / Questions) all show their entries as cards in a grid — click a card to edit, hit New to add another. There's no inline-list mode on these tabs.
- Vendor slot rates are estimates until the bill posts. The P&L pulls from the rate field, not from paid status, so a Draft Vendor Bill still counts as a cost line.
- The auto-refreshing Door Dashboard count is the real-time number. The P&L attendance number lags until registrations get marked Attended (manually or via scan).
Walkthrough: A DJ Promo Code from Scratch
The Setting Up Ticket Tiers and Promo Codes section above is the four-step quick reference. This walkthrough is the long-form version that covers the operator decisions around it: what kind of discount, how to scope it, how to audit redemptions, and what patterns work for different promo intents.
The scenario: a DJ on your Friday lineup wants a code to push to their followers. You want it to be 20% off the GA ticket tier, capped at 50 redemptions total, and to stop working 24 hours before doors so latecomers pay full price.
Create the loyalty program
- CRM → Blaqbook → Loyalty Programs → New. Give it an audit-friendly name like
Velvet Friday — DJ promo. You'll thank yourself in a month when you're trying to remember which code went to whom. - Program Type → Promo Code. (Other types — Loyalty Cards, Buy X Get Y, Coupons — don't apply here. Stick with Promo Code for codes you hand out.)
- Validity Window. Set the Valid Until date to 24 hours before doors. The code stops working automatically after that timestamp.
- Max Uses per Customer (Blaqbook-added field). Set to
1if you want one-redemption-per-person; leave at0for unlimited per-customer.
Define the discount
- Rules tab → Add a rule. Leave minimum spend / quantity blank so any cart qualifies. The rule is just "this code applies."
- Rewards tab → Add a reward:
- Reward Type → Discount
- Discount → 20% on Specific Products
- Pick the GA ticket as the product the discount applies to. (Ticket tiers are sold as products under the hood — they show up in this dropdown by tier name.)
- Maximum redemptions → 50 (this is the global cap; once 50 buyers have used the code it stops working for everyone).
Wire it to the event and test
- Promo Code tab → Code →
VELVET20(anything; uppercase reads cleanly when a follower types it on their phone). - Save.
- Open your event → Tickets tab → confirm Enable Promo Codes is toggled on for the GA tier.
- Test before the DJ posts it. Open the public ticket page in an incognito tab, add a GA ticket to cart, enter
VELVET20at checkout. The 20% drop should land before you hit pay.
Audit who used it
Once the campaign is running:
- CRM → Blaqbook → Loyalty Programs → [your program] → look at the Redemptions count and the linked sale orders. You'll see who bought, when, and what they paid post-discount.
- The P&L pulls the discounted price through to ticket revenue automatically — no separate reconciliation step needed. See the Saturday morning stage of the end-to-end walkthrough.
Patterns that work for different intents
- Early Bird automatic discount. Don't reach for promo codes for this. Set the Sale Dates range on the Early Bird ticket tier (e.g., end-date 7 days before doors). The tier disappears from the public page when the window closes; buyers see GA only. Simpler than codes, no audit overhead.
- Affiliate / DJ codes. One unique code per collaborator (
VELVET20-DJANE,VELVET20-DJBOB). The Redemptions report tells you which collaborator actually moved tickets. Worth the extra two minutes of setup if you split door fees by traffic driven. - Comp codes (free tickets). Discount 100%, max redemptions = however many comps you're issuing. Tighter than emailing PDF tickets manually because every comp shows up in the registration list as a real, scannable QR.
- Door-staff override code. A 100% code held by the manager only, for the inevitable "she was on the list but the email got eaten" case. Don't post this one anywhere; it's an in-pocket tool.
Walkthrough: Refunding a Ticket
The scenario: a buyer emails Tuesday morning. They bought two VIP tickets for Velvet Friday last week. They didn't show up — got the flu, didn't want to risk it. They're asking for a refund. Your policy says you'll honor it if requested within 7 days, no quibbling. This is the click-by-click to do it cleanly so the P&L stays honest.
Step 1 — Decide before you click
Refund decisions should happen on paper before touching software. Confirm:
Warning
Stripe fees are not refunded by Stripe. When you refund a charge, you eat the original ~$1–$2 of processing fees per ticket. That's the cost of doing business; don't try to pass it to the customer.
- Within your refund window? Most operators commit to a window publicly (e.g., 7 days, or up to 48 hours before doors). Honor what you said.
- Full or partial? A no-show 48 hours out is often a 100% refund. A buyer who showed up and left at midnight isn't getting their VIP money back. Stripe lets you partial-refund any percentage.
- Stripe fees are not refunded by Stripe. When you refund a charge, you eat the original ~$1–$2 of processing fees per ticket. That's the cost of doing business; don't try to pass it to the customer.
Step 2 — Cancel the registration
Doing this first means the door scanner won't accept the ticket even if the buyer changes their mind, and the P&L stops counting their seat.
- Events → [event] → Registrations.
- Search for the buyer by name or email.
- Open their registration record.
- Click the Cancel state label at the top of the form.
- Add a note in the chatter at the bottom:
Refund requested by buyer email YYYY-MM-DD — flu, no-show. This is your audit trail when someone asks 6 months later why this seat shows cancelled.
If they bought multiple tickets in one order and want to refund only some, cancel the specific registrations — each ticket is its own registration record.
Step 3 — Refund the charge in Stripe
Odoo doesn't reach into Stripe to refund automatically. You issue the refund Stripe-side; Odoo learns about it via webhook when the next bank reconciliation runs.
- Open your Stripe dashboard → Payments.
- Search for the buyer's name or email.
- Find the charge for their ticket order.
- Click Refund. Pick Full or Partial.
- Reason →
Requested by customer(Stripe stores this; it appears on the buyer's statement). - Submit. Stripe immediately reverses the charge; the funds clear back to the buyer's card in 5–10 business days.
Step 4 — Reconcile on the Odoo side
The next Stripe payout will reflect the refund — it'll be smaller by the refund amount, and you'll see the refund as a negative line in the payout's transactions.
- When the next payout lands, follow the Stripe Payout Reconciliation walkthrough — the refund shows up as a transaction with a negative amount.
- The P&L for the event auto-updates because the registration is now Cancelled (it stops counting toward ticket revenue).
- If you tracked Stripe fees per event under P&L tab → Expenses, the unrecovered fees on the refunded ticket stay as a tiny expense line. That's correct — you paid that fee, you don't get it back.
Step 5 — Close the loop with the buyer
- Reply to their email: "Refunded — $X via Stripe, expect 5–10 business days back to your card." Keep it warm; today's refund is next month's repeat customer.
- If you've got an email automation that fires a post-event recap, manually unsubscribe their email from this event's send list (open the Email Send Log, find the future send for that partner, delete the row) — sending a "thanks for coming!" recap to someone you just refunded is a bad look.
Edge cases
- Buyer disputes the charge instead of asking nicely. A Stripe dispute (chargeback) is the customer's bank pulling the funds back forcibly. Stripe debits your next payout for the full amount plus a dispute fee. The registration stays in whatever state it was (often Attended if they actually showed up); you can't proactively cancel it without making the dispute worse. Let Stripe's dispute process play out before touching Odoo.
- POS cash refund. Cash refunds at the door go through the POS, not Stripe — open the POS session, find the order, refund through POS UI. See eCommerce.
- Comp-the-refund-by-rebooking. Sometimes the buyer is OK with credit toward a future event instead of cash back. Issue a comp code for the refund amount, share it with that buyer only. They get to use it on a future ticket; you keep the cash.
Related
- Door Scanner — check guests in on event night
- Finance — run the post-event P&L, assign vendor bills
- CRM & SMS — send a pre-event SMS blast to a contact segment